
Sub-User Manual Overview
Applies to: Sub-users Last updated: 2026-07-14
You are a sub-user under an organization, calling AI models via an API Key. This handbook helps you understand the following in 5 minutes: what you can see, how to create a Key, and how to call models.
If the menu you see after logging in has far more than 5 items (for example, "Sub-user Management", "Balance Management", "Redeem", etc.), it means you are an organization (top-level user). Please refer to the Administrator Handbook.
1. What Is a Sub-user
A sub-user is a usage entity under an organization. The organization administrator creates your account, allocates quotas, and authorizes groups for you. You call models with your Key, and consumption is deducted from the organization's balance pool. You do not need to top up yourself, nor can you see the organization's financial details.
2. Pages You Can See
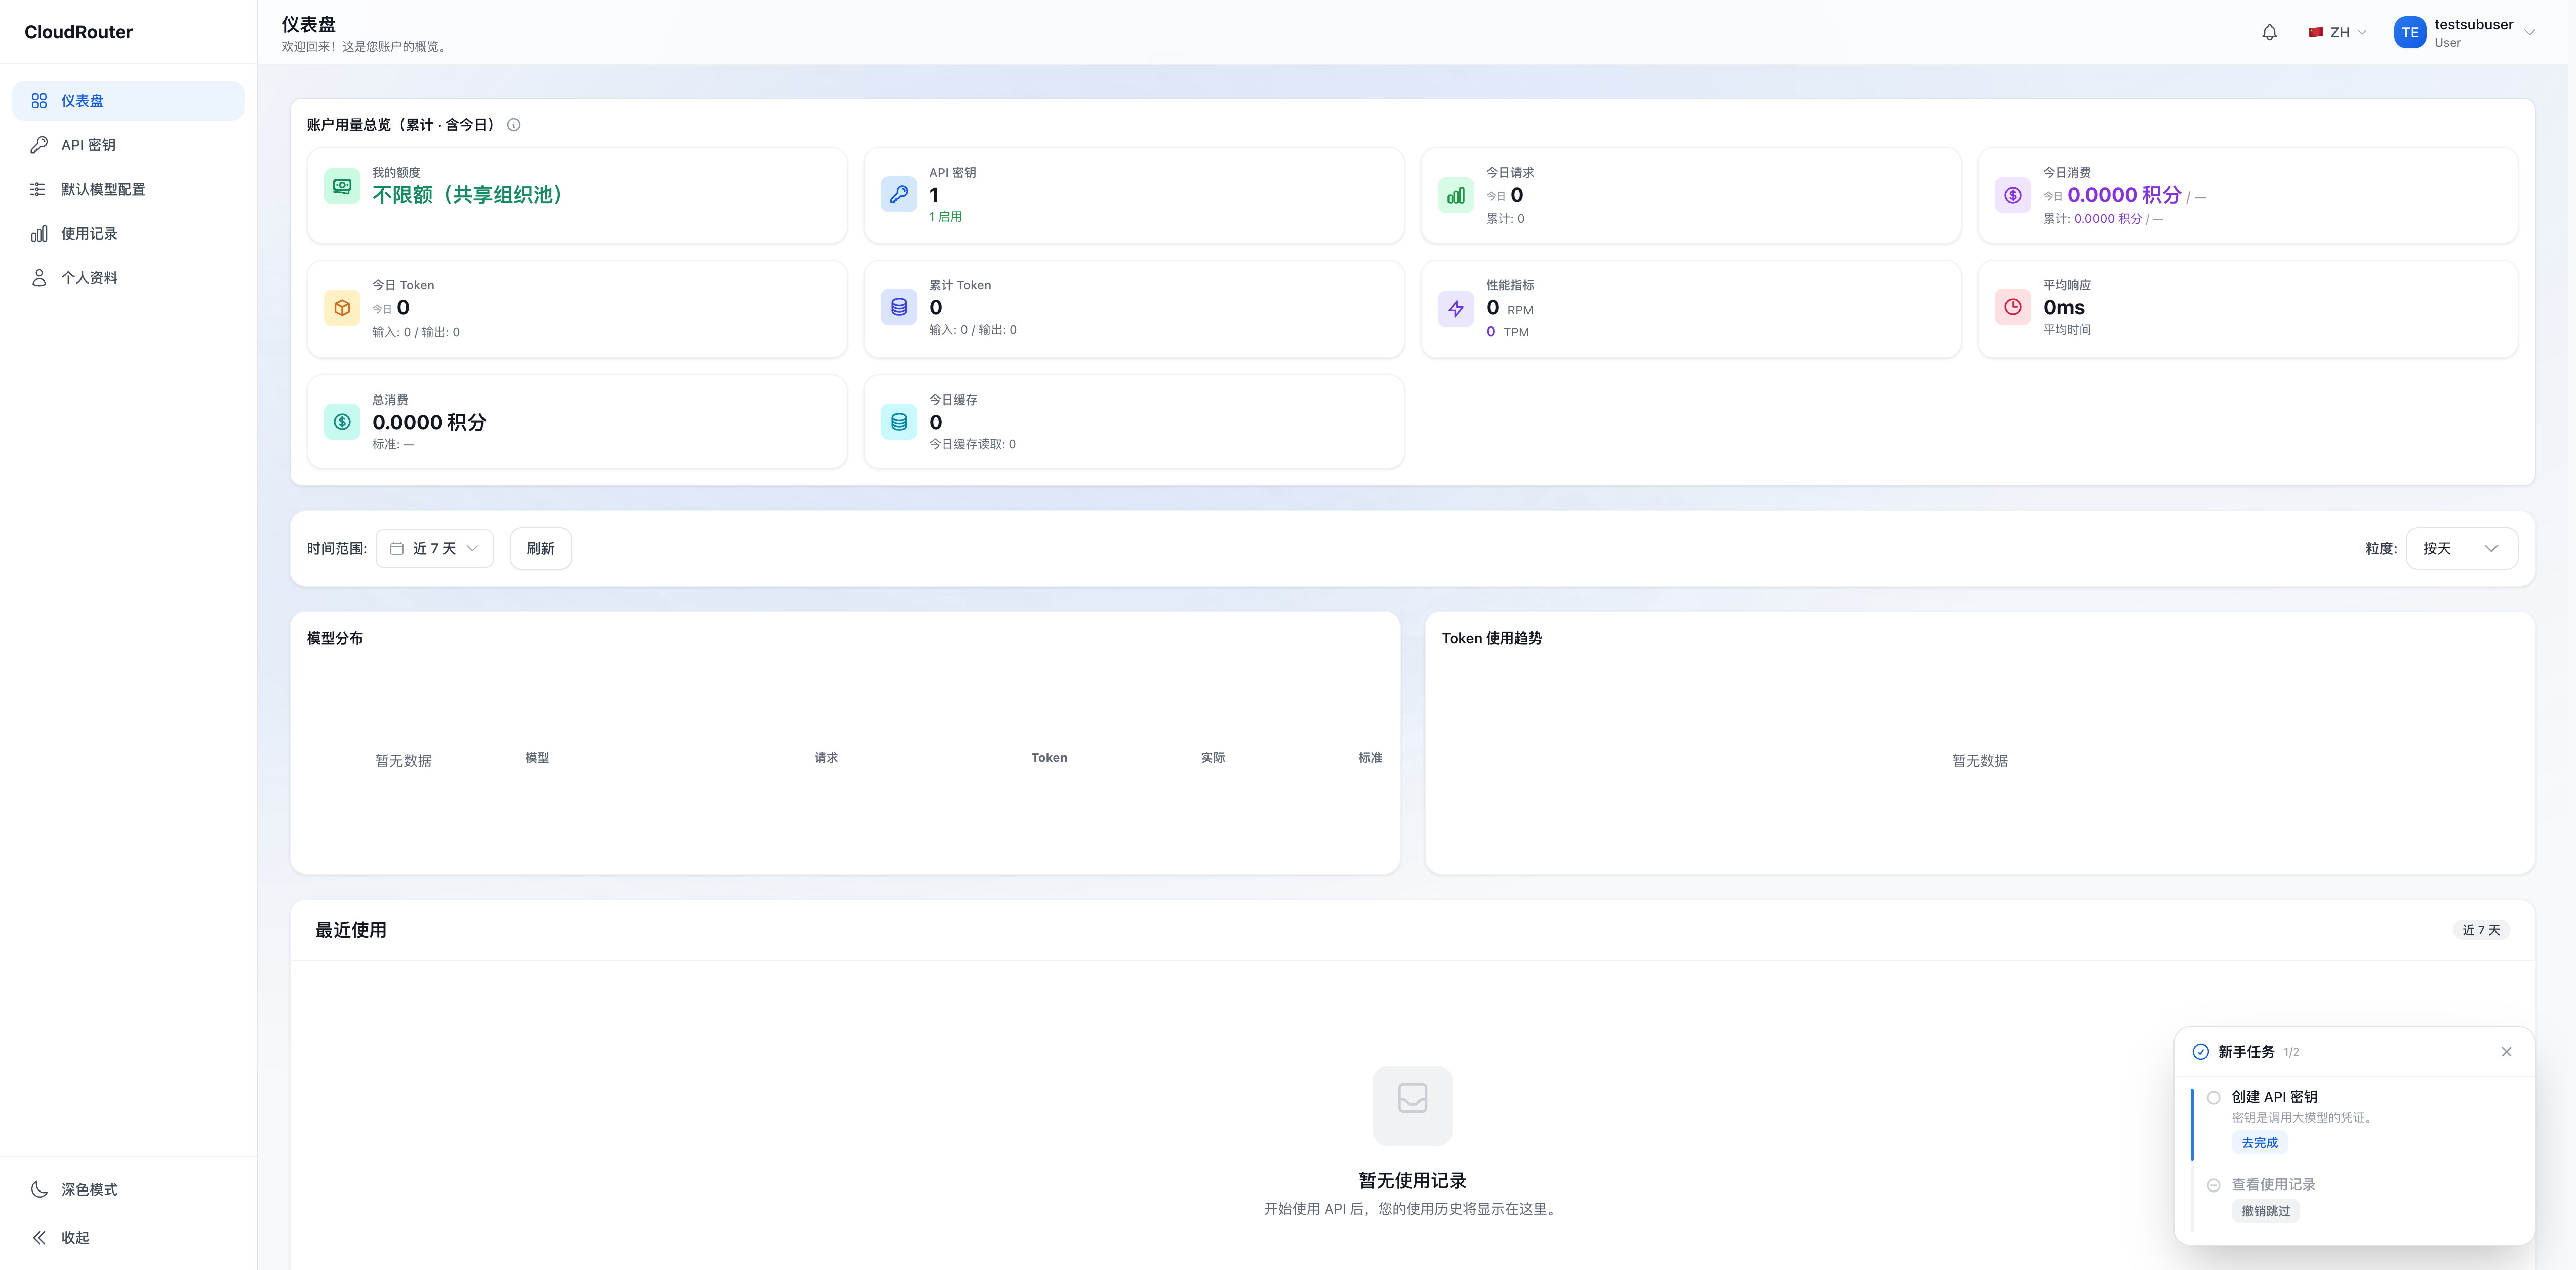
After logging in to the console, the left navigation bar displays the following basic menu items. Manually entering other URLs will automatically redirect you back to the dashboard.
| Menu | Path | Purpose | Detailed Docs |
|---|---|---|---|
| Dashboard | /dashboard |
View balance overview and recent usage (read-only) | Dashboard and Quotas |
| API Keys | /keys |
Create and manage your API Keys | API Key Management |
| Default Model Config | /default-model-config |
Set a default routing group for each model | Call Guide |
| Usage Records | /usage |
View your call history | Usage Records and Profile |
| Profile | /profile |
Change password and view account information | Usage Records and Profile |
The console interface after a sub-user logs in:
3. Quick Start Path
For your first time, we recommend following this sequence:
- Activate your account -- Receive the activation code from your organization administrator, visit the activation page to complete registration, and set a password. See Activation and Login
- Log in to the console -- Log in to the console using the account and password you set during activation (the address is provided by your administrator)
- Create an API Key -- Create a Key on the "API Keys" page and select a routing group. See API Key Management
- Copy the call name -- View available models on the "Call Guide" page, and copy the model name as the model ID; if your organization has enabled group-identifier routing, you can also copy the call name with the group identifier. See Call Guide
- Integrate and call -- Fill in the Key and model ID in your code or tools, and start calling
For the complete API integration methods (SDKs, request formats, error codes, etc.), see the Developer Guide.
4. FAQ Quick Reference
| Question | Where to Look |
|---|---|
| What if I didn't receive an activation code? | Activation and Login -- Contact your organization administrator |
| What if my quota is used up? | Dashboard and Quotas -- Contact your organization administrator to adjust the quota |
| The group I want isn't in the dropdown? | API Key Management -- The organization has not yet authorized that group for you |
What should I fill in for model when calling? |
Call Guide -- Enter the model name, which you can find on the Call Guide page or the Model Marketplace |
| Forgot your password? | Activation and Login -- Password reset process |
| More FAQs | Sub-user FAQ |